
Hello and Happy Spring! Maybe it’s the warm weather, but I find myself being drawn to bold floral prints lately. I also was thinking about something big and bold I could do in my kitchen. I love my kitchen, but I wanted to spice up the large wall behind my table.
Being the decor budget minded gal I am, I started thinking of art I could DIY. I looked for large prints, but prints can be pricey. Especially when you want something BIG 😉

Then I had an idea! I would create my own wood frame, and wrap it in a bold floral print!
Author’s Note: If you’ve followed me for some time, you’ll know that I have a tendency to go the nontraditional route. I’ve painted curtains. I’ve put fabric on closet doors. I also have a tendency to remove doors. More on that in another post.
Off to Joann’s Fabric I went. I made best friends with the woman at the cutting counter. Heck, she asked me if wanted to save another 20% on top of the 30% I was already saving since the fabric was on sale. (If you text COUPON to 56266, then you’ll get a link for 20% off.) I spent $33 on fabric.
Then I went to my second home, Home Depot, and spent $4 on the wood for the frame. No joke. And that’s regular price! I grabbed four 8ft pieces of wood. Since they’ll cut wood for free, I asked them to cut two down to 50″, and cut the third into two 48.5″ pieces. Each piece is 1.5″ wide, so that is why two pieces are 1.5″ shorter than the other two.
This post contains affiliate links. Click here to read my full disclosure policy.
Here’s what I used to build the frame and finish the project:
- staple gun (the heavy duty kind)
- electronic staple gun that uses smaller staples
- wood glue
- inexpensive solid fabric to back the fabric, I used black
- pretty fabric for the front (mine is from the Nicole Miller line at Joann’s)
- stud finder
- hammer
- 3-4 nails
I tried using screws and nails to build the frame, but I kept splitting the wood. I looked around my work area in my garage and saw the heavy duty nail gun! I grabbed the wood glue, the wood, the nail gun and got to work laying it out in my driveway. I can only imagine what my neighbors think when I’m doing strange DIY projects outside.
I laid out the wood in a box, with the longer pieces on the sides. The two shorter 48.5″ pieces are at the top and bottom, and fit inside the two longer side pieces. Doing this, I would have my 50″ x 50″ frame.
I put a little wood glue where I wanted the wood to come together and then used 2 – 3 staples in each corner on each side, making sure each staple was firmly embedded in both pieces. There were a couple I had a use a hammer on to make them flush with the wood.
(Please excuse the bad photos. I let the battery die in my nice camera, so iPhone it is!)
I took the frame to my kitchen and started on the fabric.
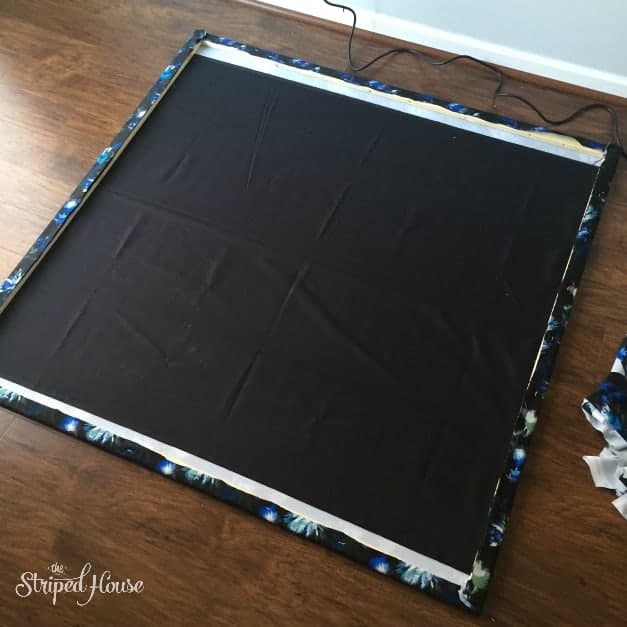
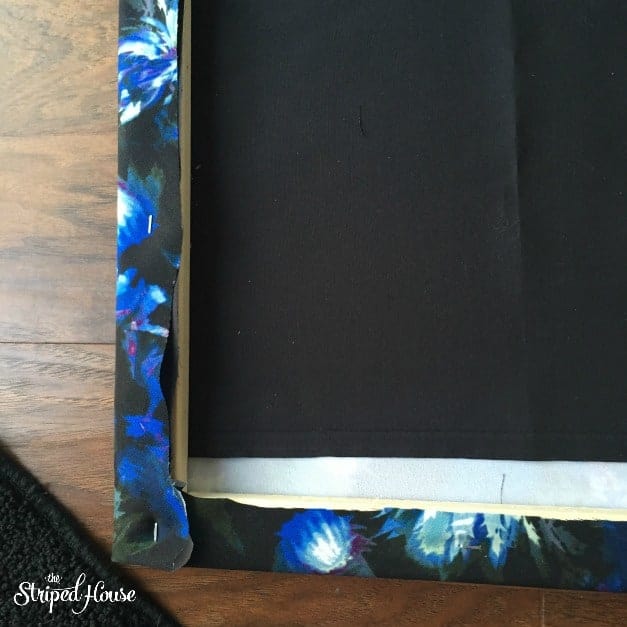
I ironed the patterned fabric on medium heat. Then laid it face down on my kitchen floor. Then I laid the black liner fabric on top. On the very top was the frame. I was a few inches short on the top and bottom of the black fabric, but I’m not worried about it. I folded the black fabric over the side, making sure I folded over the same amount the whole length of the wood. Then I stapled it (with the smaller electric staple gun), making sure they were stapled straight and evenly spaced.
You can see how I stapled the joints in this photo.

I went to the opposite and pulled the fabric tight and folded it over the wood, making sure not to pull so tight that the fabric had “waves”.
I lifted it to check my work from the front. I laid it back down and trimmed off the excess.

Then I repeated the same process with the pretty fabric. Right side, left side, top, bottom. There are probably 8-10 staples on each side for this fabric. That electronic staple gun was fun! I actually leaned it against the wall to check my work before I trimmed the excess pretty fabric. All looked good, so I trimmed away.
Then I used my stud finder to find studs in my wall to hang this. I used 3 nails to hang this beast. I purposely chose studs that were in the middle so I could slide the frame to the right or left and get it in the perfect spot 🙂


All in all, I spent $37 on the project and couldn’t be happier! The frame is so cheap that I could easily make a fall/winter version and swap them out with the seasons.


Such a great idea for relatively cheap art! I especially love that print!
This is perfect for a weird big wall that I have, and have never figured out what to do with! Thanks for the great idea and tips to make it successful
I like how you tend to go the non-traditional route on things, Jen! That print looks really good on your bright wall. It draws you in, I think! Also, it sounds like I need to learn some budget buying advice from you, because you scored big time on those deals. $33 on fabric and $4 on wood? Yes, please! 🙂 Great job!
What a great idea for people who live in an apartment and can’t paint or poke a hole in the wall to hang anything. You could use 3M hooks to hang the frame also for no holes whatsoever!
I will definitely use your idea when I move to an apartment! Thanks for the tip.
Could you email me the article so I could print it out? Thanks